Instructions for individual Apps
- Bitwarden Password Manager
- Jellyfin
- Matrix & Element Chat Server
- NextCloud
- Sync Calendar and Contacts (example iPhone or Mac OS) via CalDAV and CardDAV protocols
- Create a "App Password"
- Connect via WebDAV to your Account
- View PDFs in the Web Interface
- Immich
Bitwarden Password Manager
Important Settings
These are best-practices for your Bitwarden client (e.g. App, Browser Extension, etc.):
Log in
To log into your vault, you can use the app or the web interface trough a browser.
Log in trough a Web Browser
Visit https://safe.masali.cloud to log in.
Log in trough the App
In the App, select a different server than the stock bitwarden.com server. Change the URL to "selfhosted" with the value: safe.masali.cloud.
Log in normally as you would trough the browser.
Jellyfin
Best settings for smooth playback
Configure Playback
For smooth playback, set the following playback configuration in your settings. This enables very little buffer when opening media. You can adjust your playback quality afterwards as required.
In the mobile App
In the Internet Browser
Matrix & Element Chat Server
Official Element User Guide
You can access the official Element App User Guide in their documentation: https://element.io/user-guide
Log in
Trough the Web or Desktop App
I am logging in via the browser. It's exactly the same procedure in the Element mobile app or desktop app!
We are running Element Server Suite Community Edition (ESS). The URL for is: ess.masali.cloud
Log in trough the Web by going to the Server URL https://ess.masali.cloud
Log in trough the Desktop App "Element" (available for all operating Systems) by downloading it here and running it.
Follow the steps outlined in the video below. Our server URL is "ess.masali.cloud":
Trough the Mobile App
Download the App from your App Store or by visiting the official Website of the Client: https://element.io/download
Follow the steps outlined in the video below. Our server URL is "ess.masali.cloud":
NextCloud
Sync Calendar and Contacts (example iPhone or Mac OS) via CalDAV and CardDAV protocols
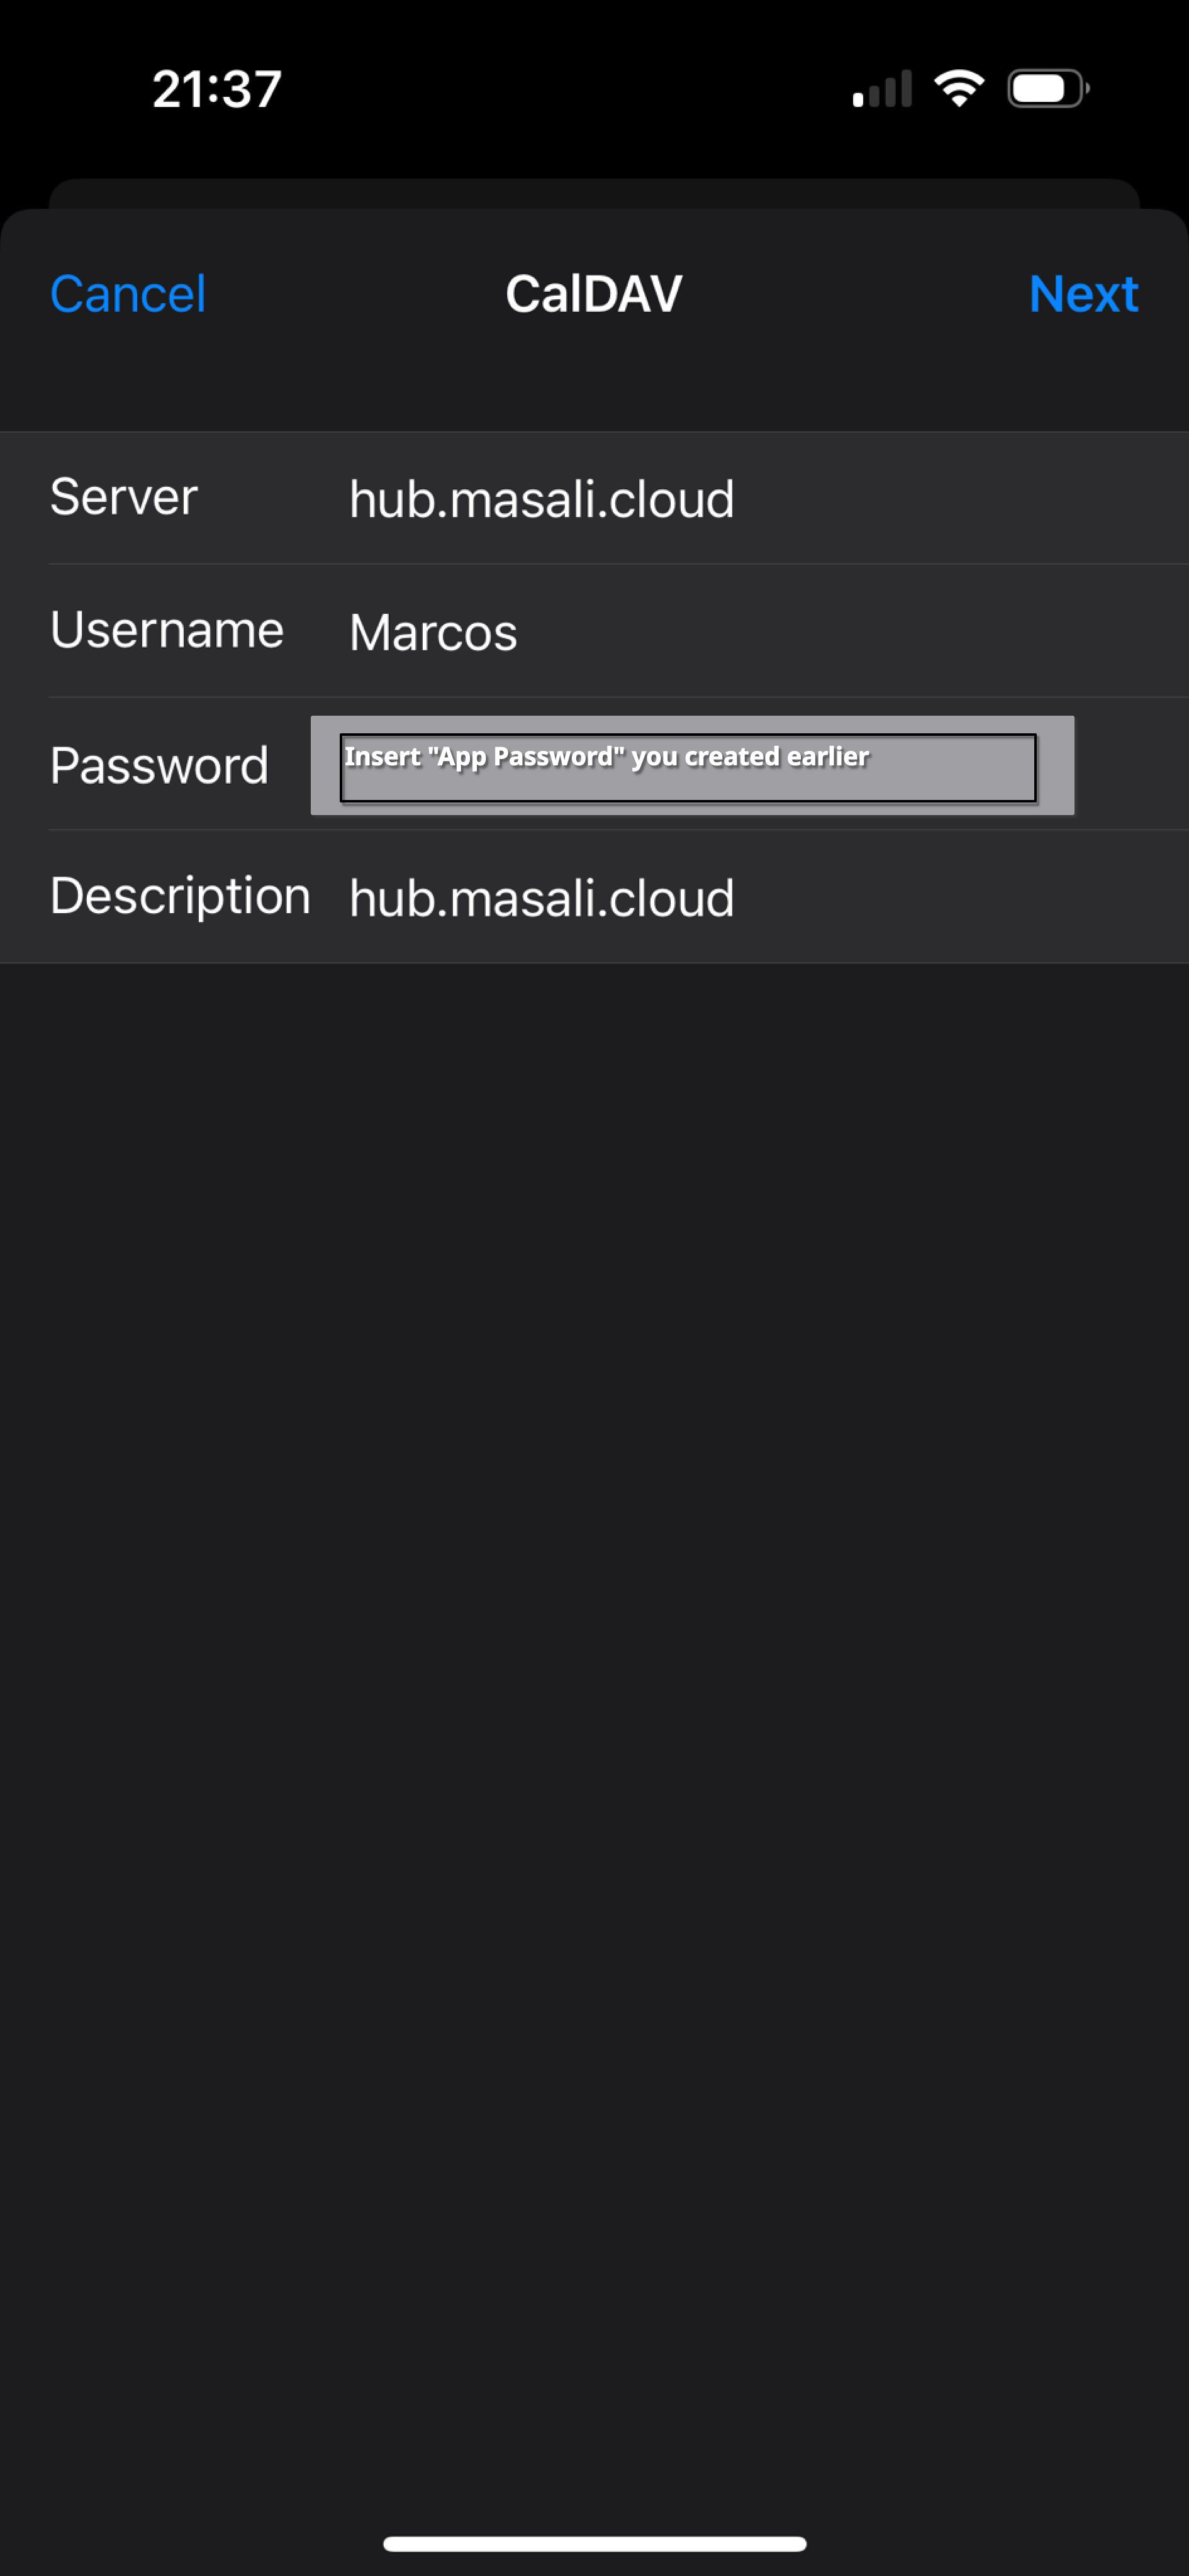
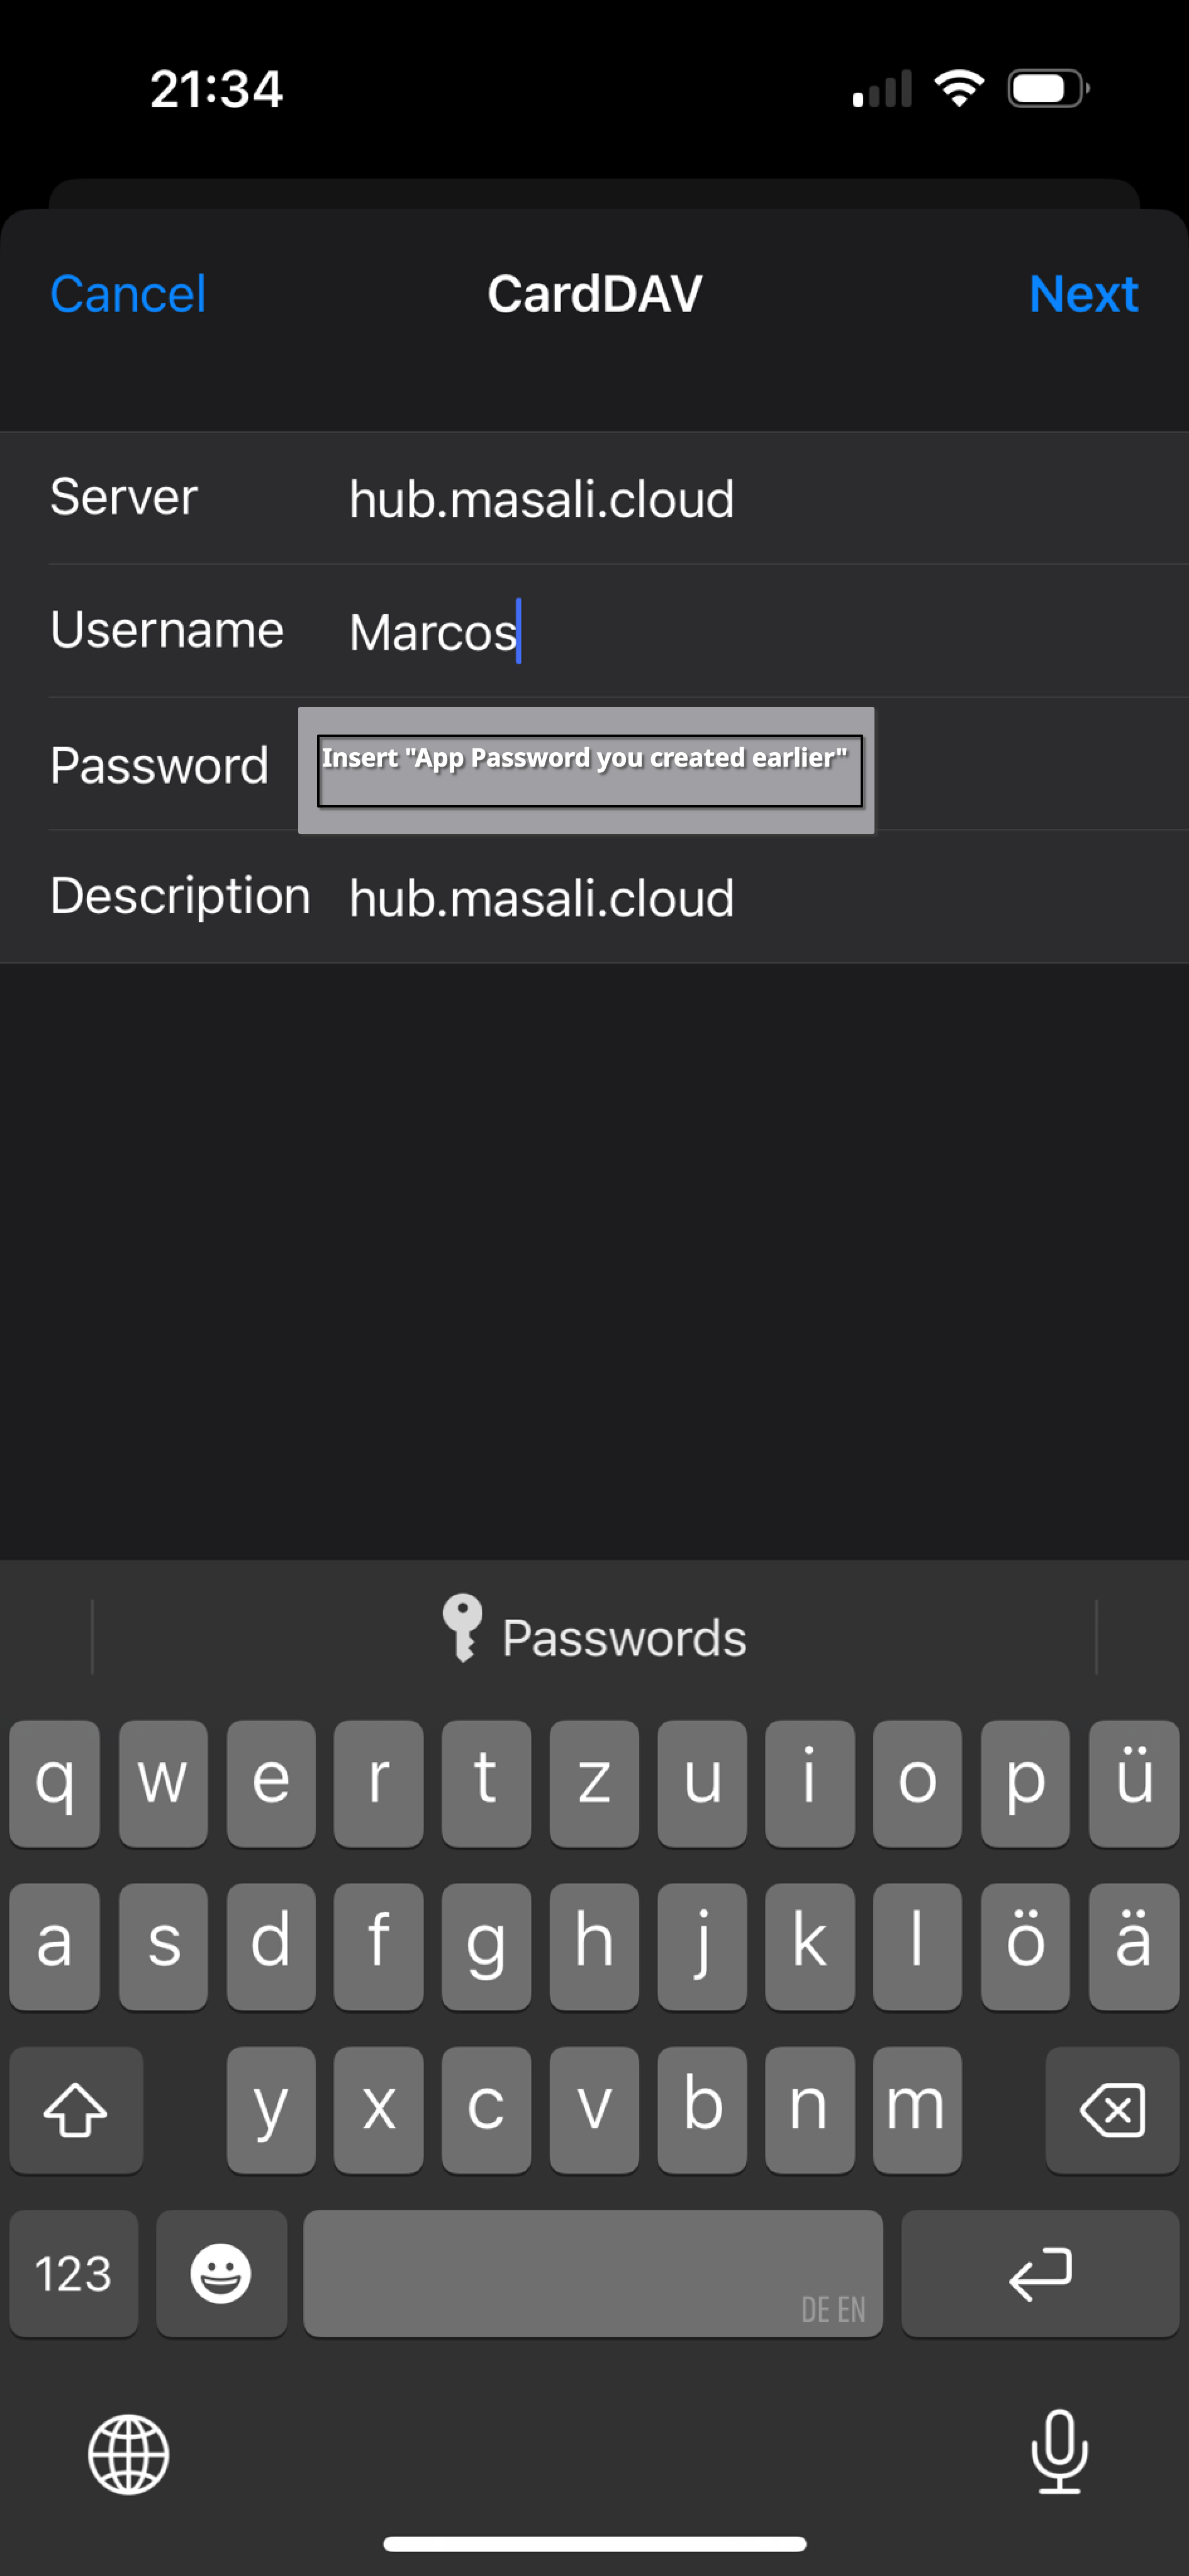
Calendar and contacts are added to macOS and iOS in the same way:
First, you need to create an "App Password" for your new connection. Follow this guide to complete this step.
Add Calendar Sync
In the next step, add the calendar to your iPhone / Mac:
Go to Settings -> Calendar -> Accounts -> Add Account -> “Other” -> “Add CalDAV Account”... and fill in the fields as shown below.
Add Contact Sync
To add contact synchronization, go to: Settings -> Calendar -> Accounts -> Add Account -> “Other” -> “Add CardDav Account”... and fill in the fields as shown below.
Create a "App Password"
If you have 2FA (two factor authentification) enabled, there is no way apps like calendar, contacts (trough CalDAV, CardDAV protocols) or other internet protocols such as WebDAV can sync with your account. To enable this feature, Nextcloud lets you create "App Passwords" trough your account settings. Even if you change your Account's Password, the "App Passwords" so you do not need to re-connect all your clients and apps.
To create a new "App Password", go into your account's security settings:
Connect via WebDAV to your Account
What is WebDAV?
WebDAV allows you to access and manage files on a server as if they were on your local device. You can upload, download, create, move, delete files and folders, and collaborate by managing versions and locking files.
There is a very extensive guide on the topic of WebDAV and Nextcloud which can be found here.
To connect to your NextCloud via WebDAV, first create an "App Password" (e.g., named "WebDAV") by following this guide. Then, use this URL in your file manager or app:
https://hub.masali.cloud/remote.php/dav/files/YOUR-USER-NAME-HERE/Do not forget to insert your username you got when creating an "App Password" in place of "YOUR-USER-NAME-HERE"!
View PDFs in the Web Interface
Due to a security setting, the browser times out when clicking on a PDF to open it. A simple workaround is to open the PDF file with Nextcloud Office:
Immich
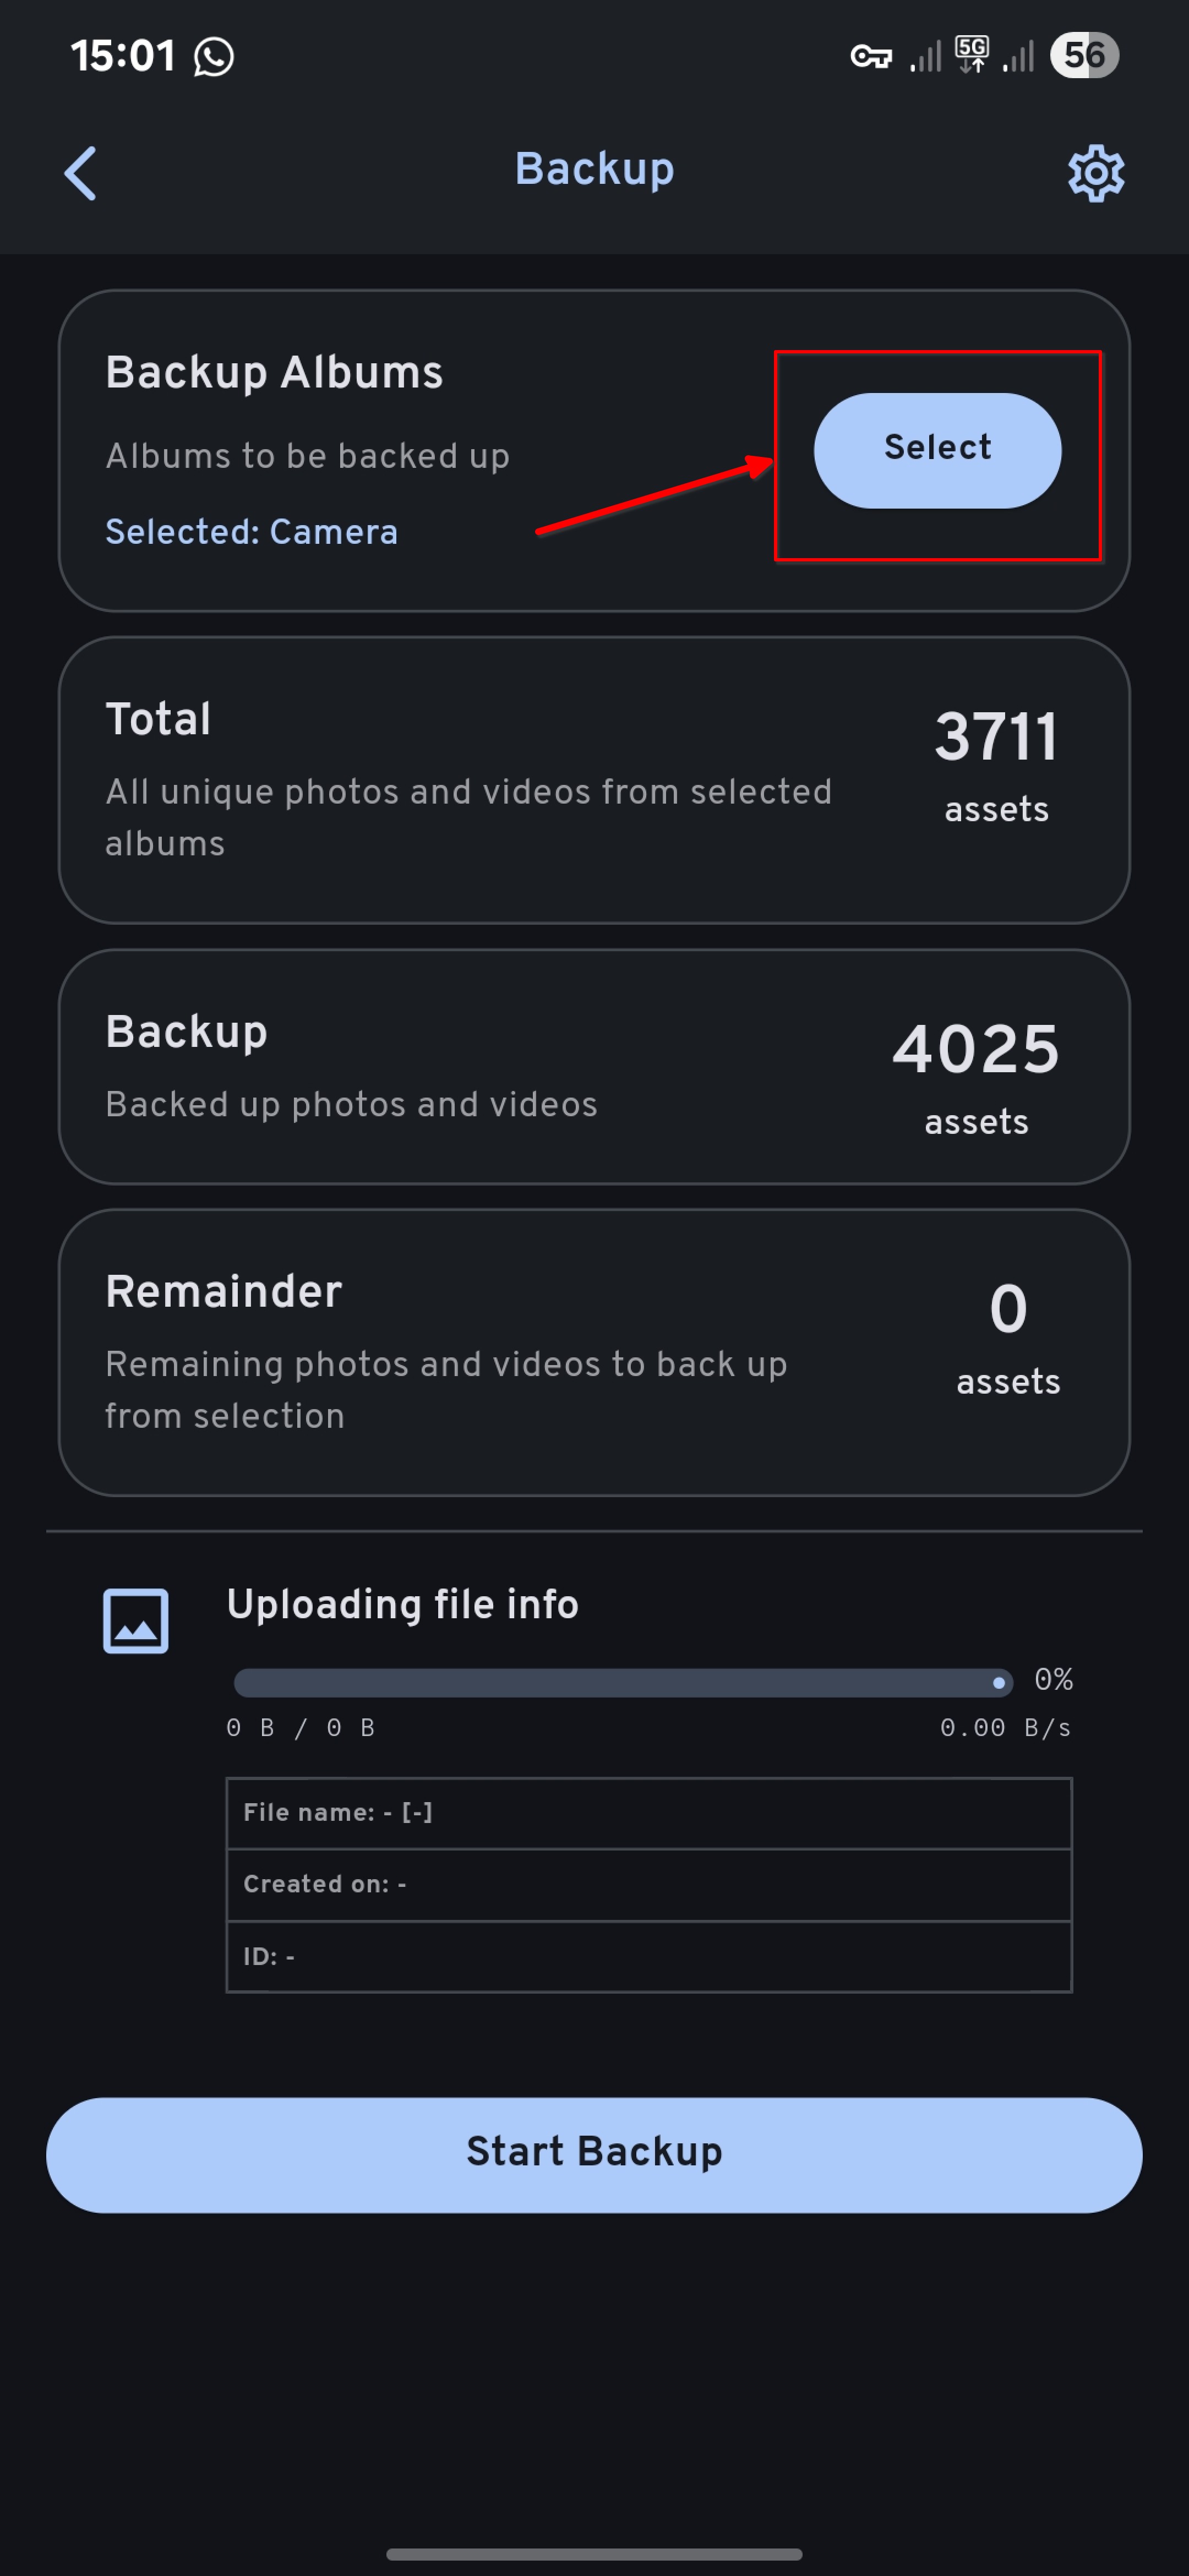
Enable automatic Backup on the Smartphone App
Immich supports uploading photos and videos from your mobile device to the server automatically.
You can follow the official guide from Immich's Documentation here: https://immich.app/docs/features/automatic-backup
Log in
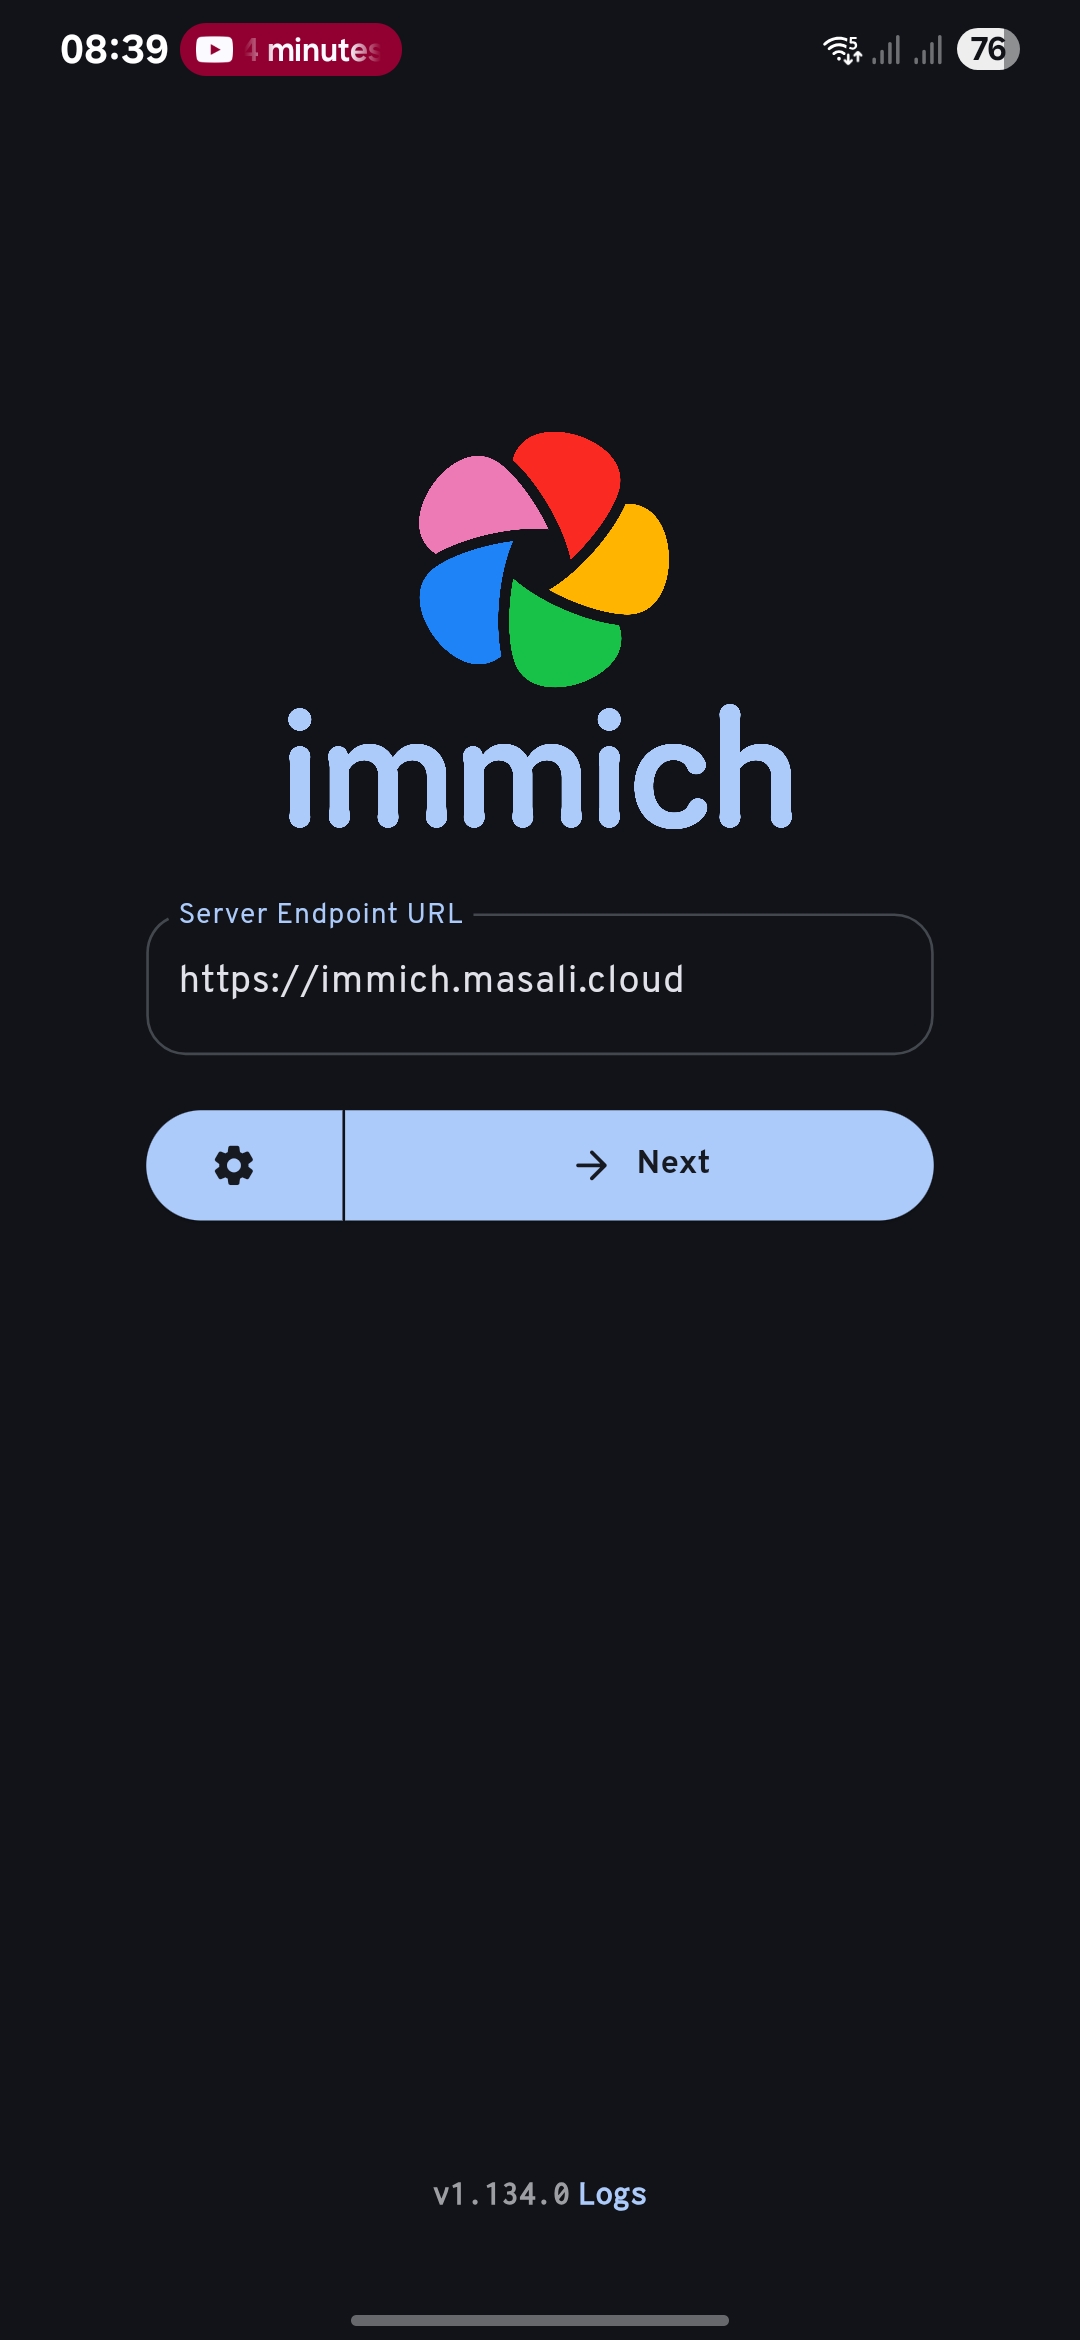
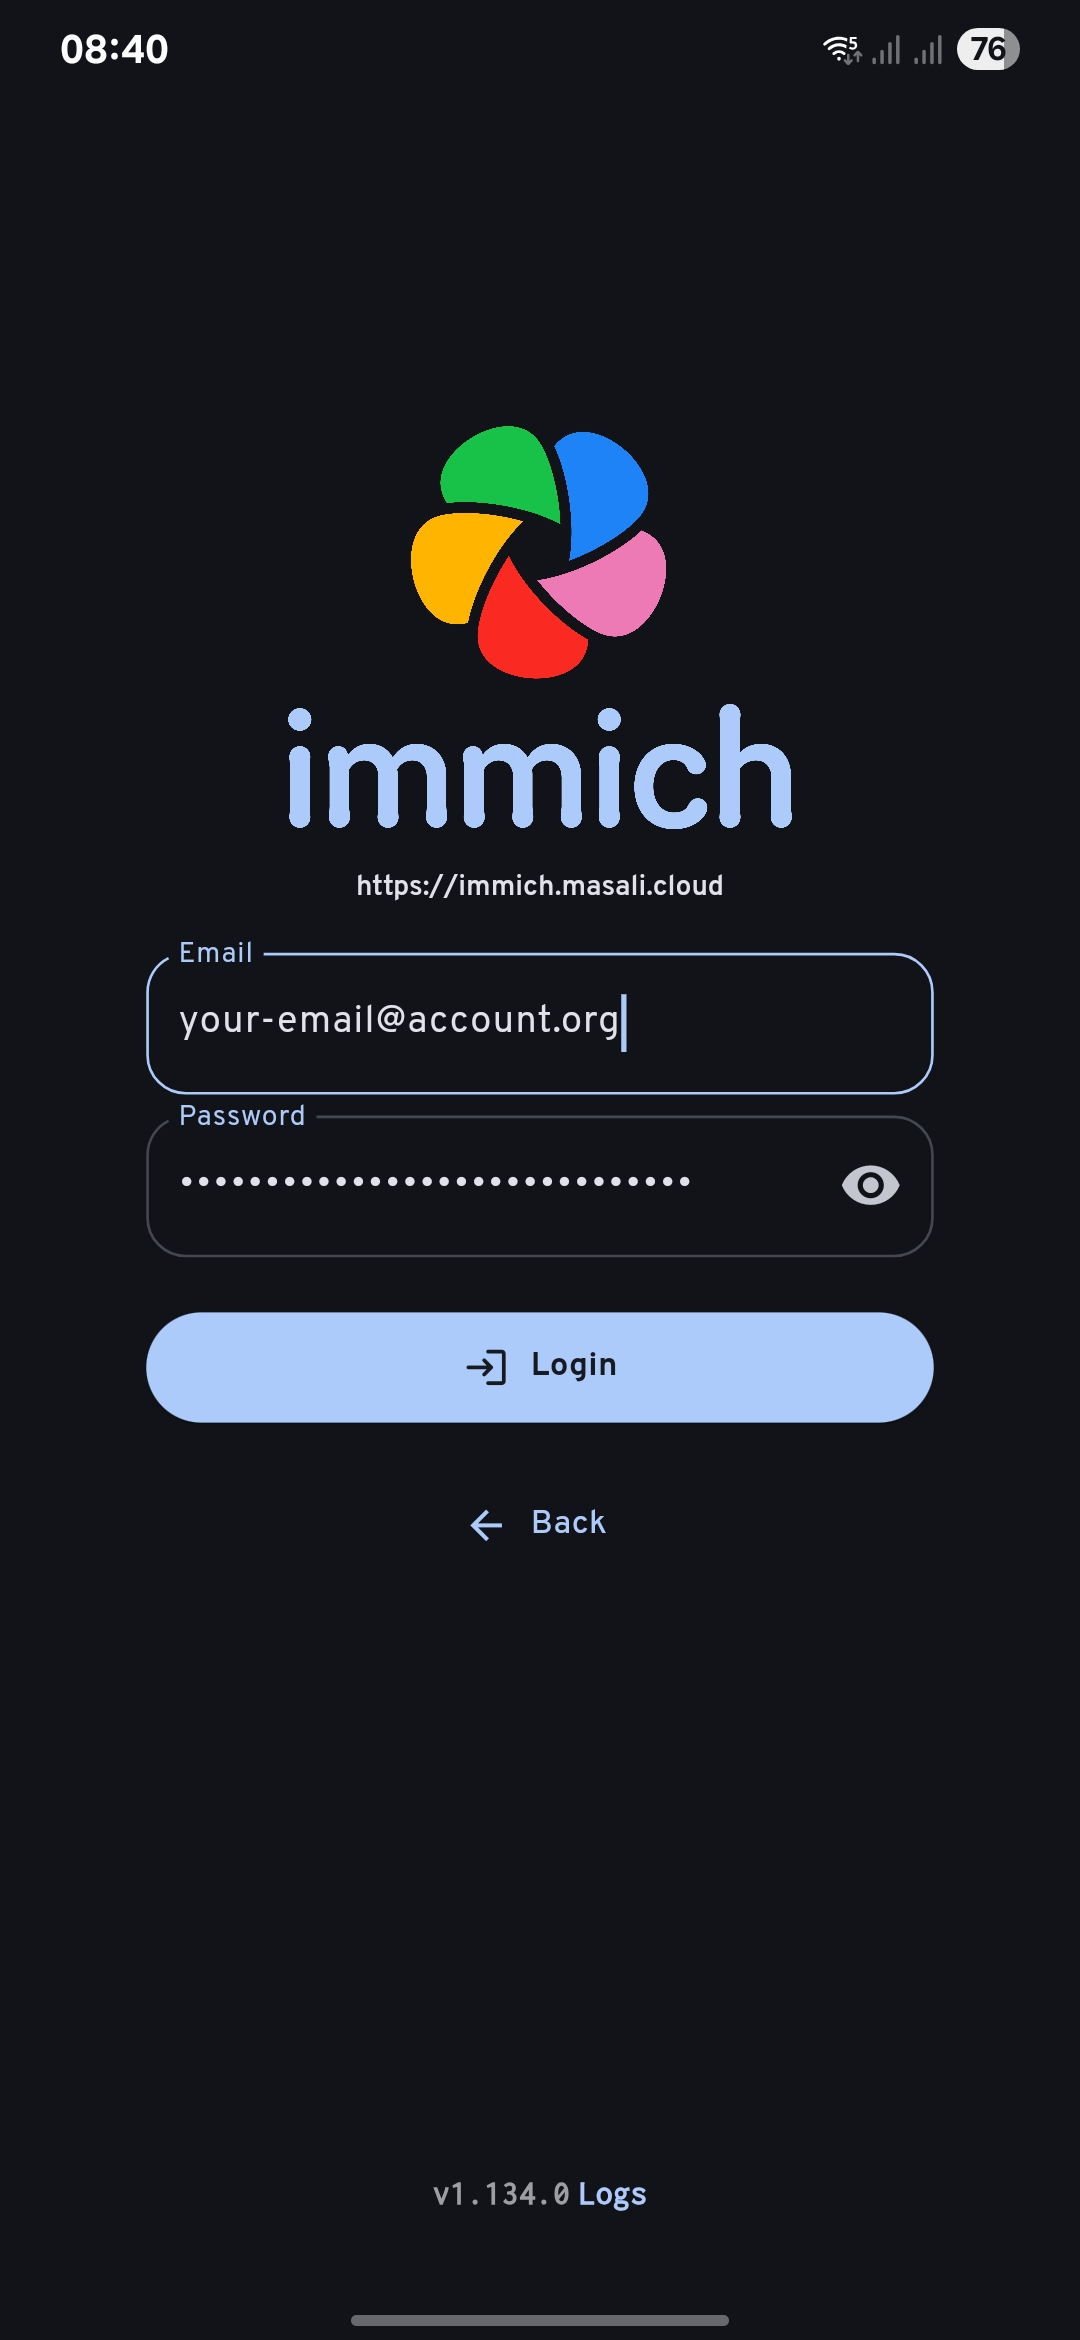
Trough the App
Example on how to log into the App:
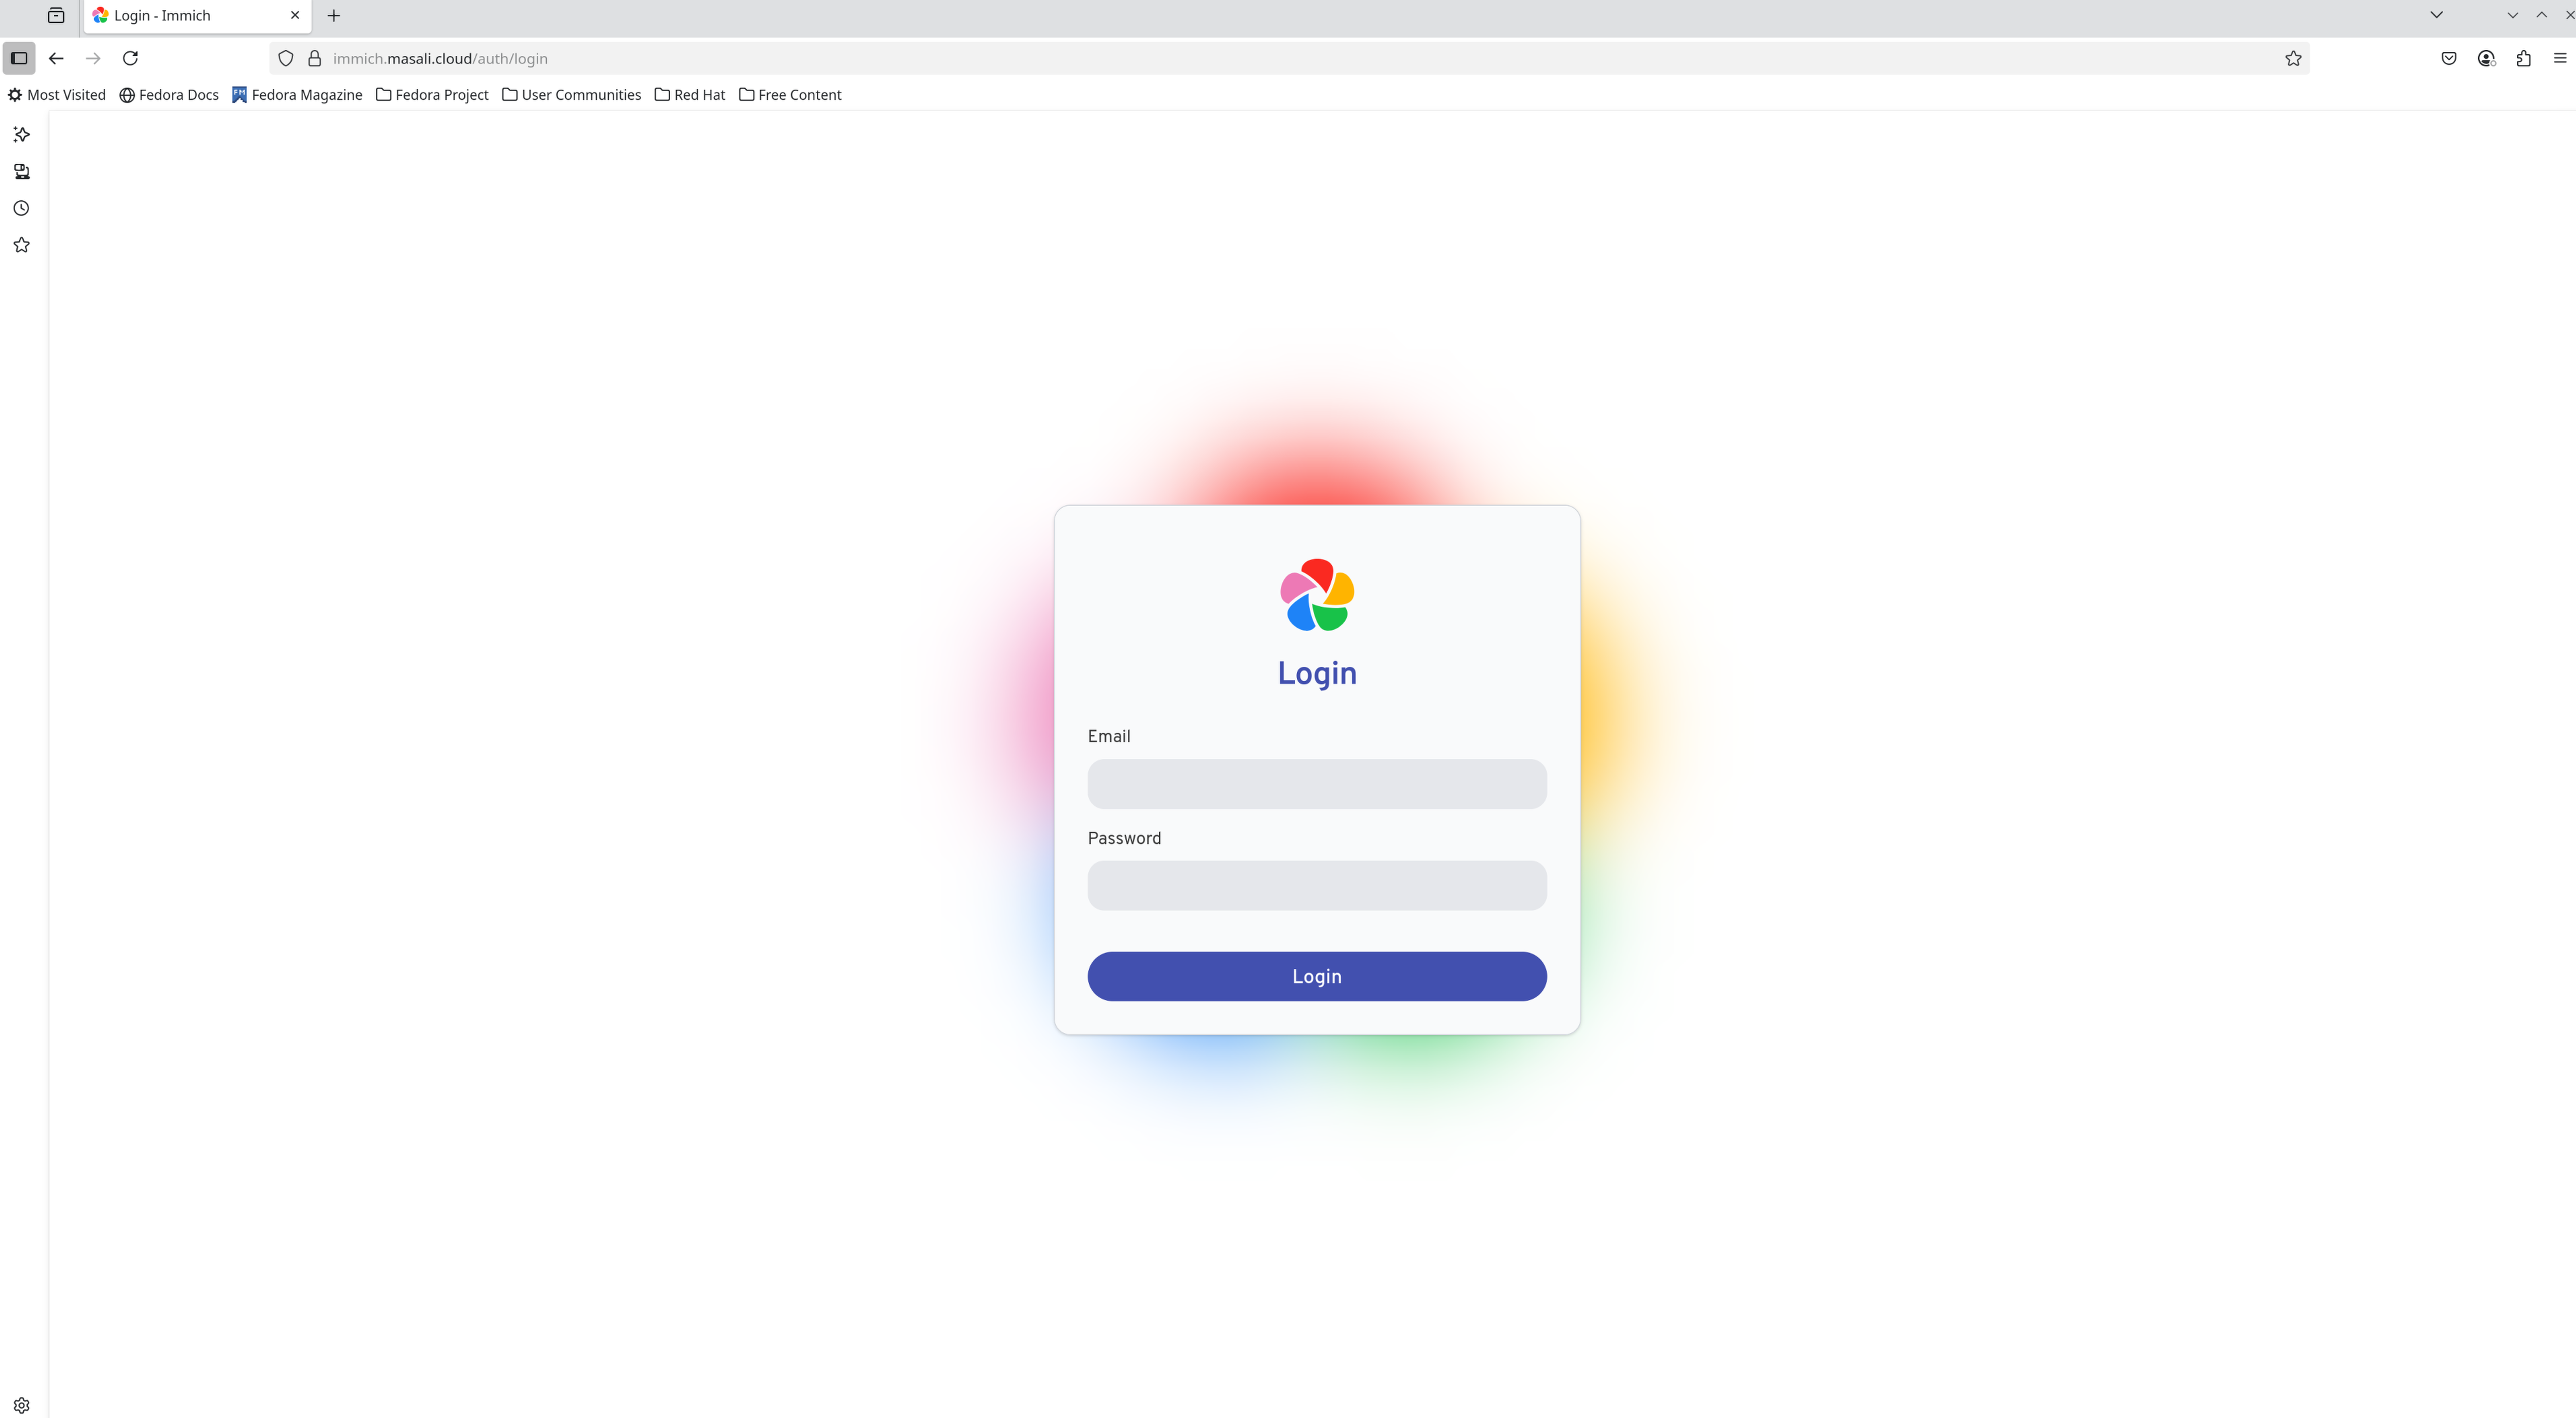
Trough a Brower
Go to the server URL: https://immich.masali.cloud and log in with your credentials.
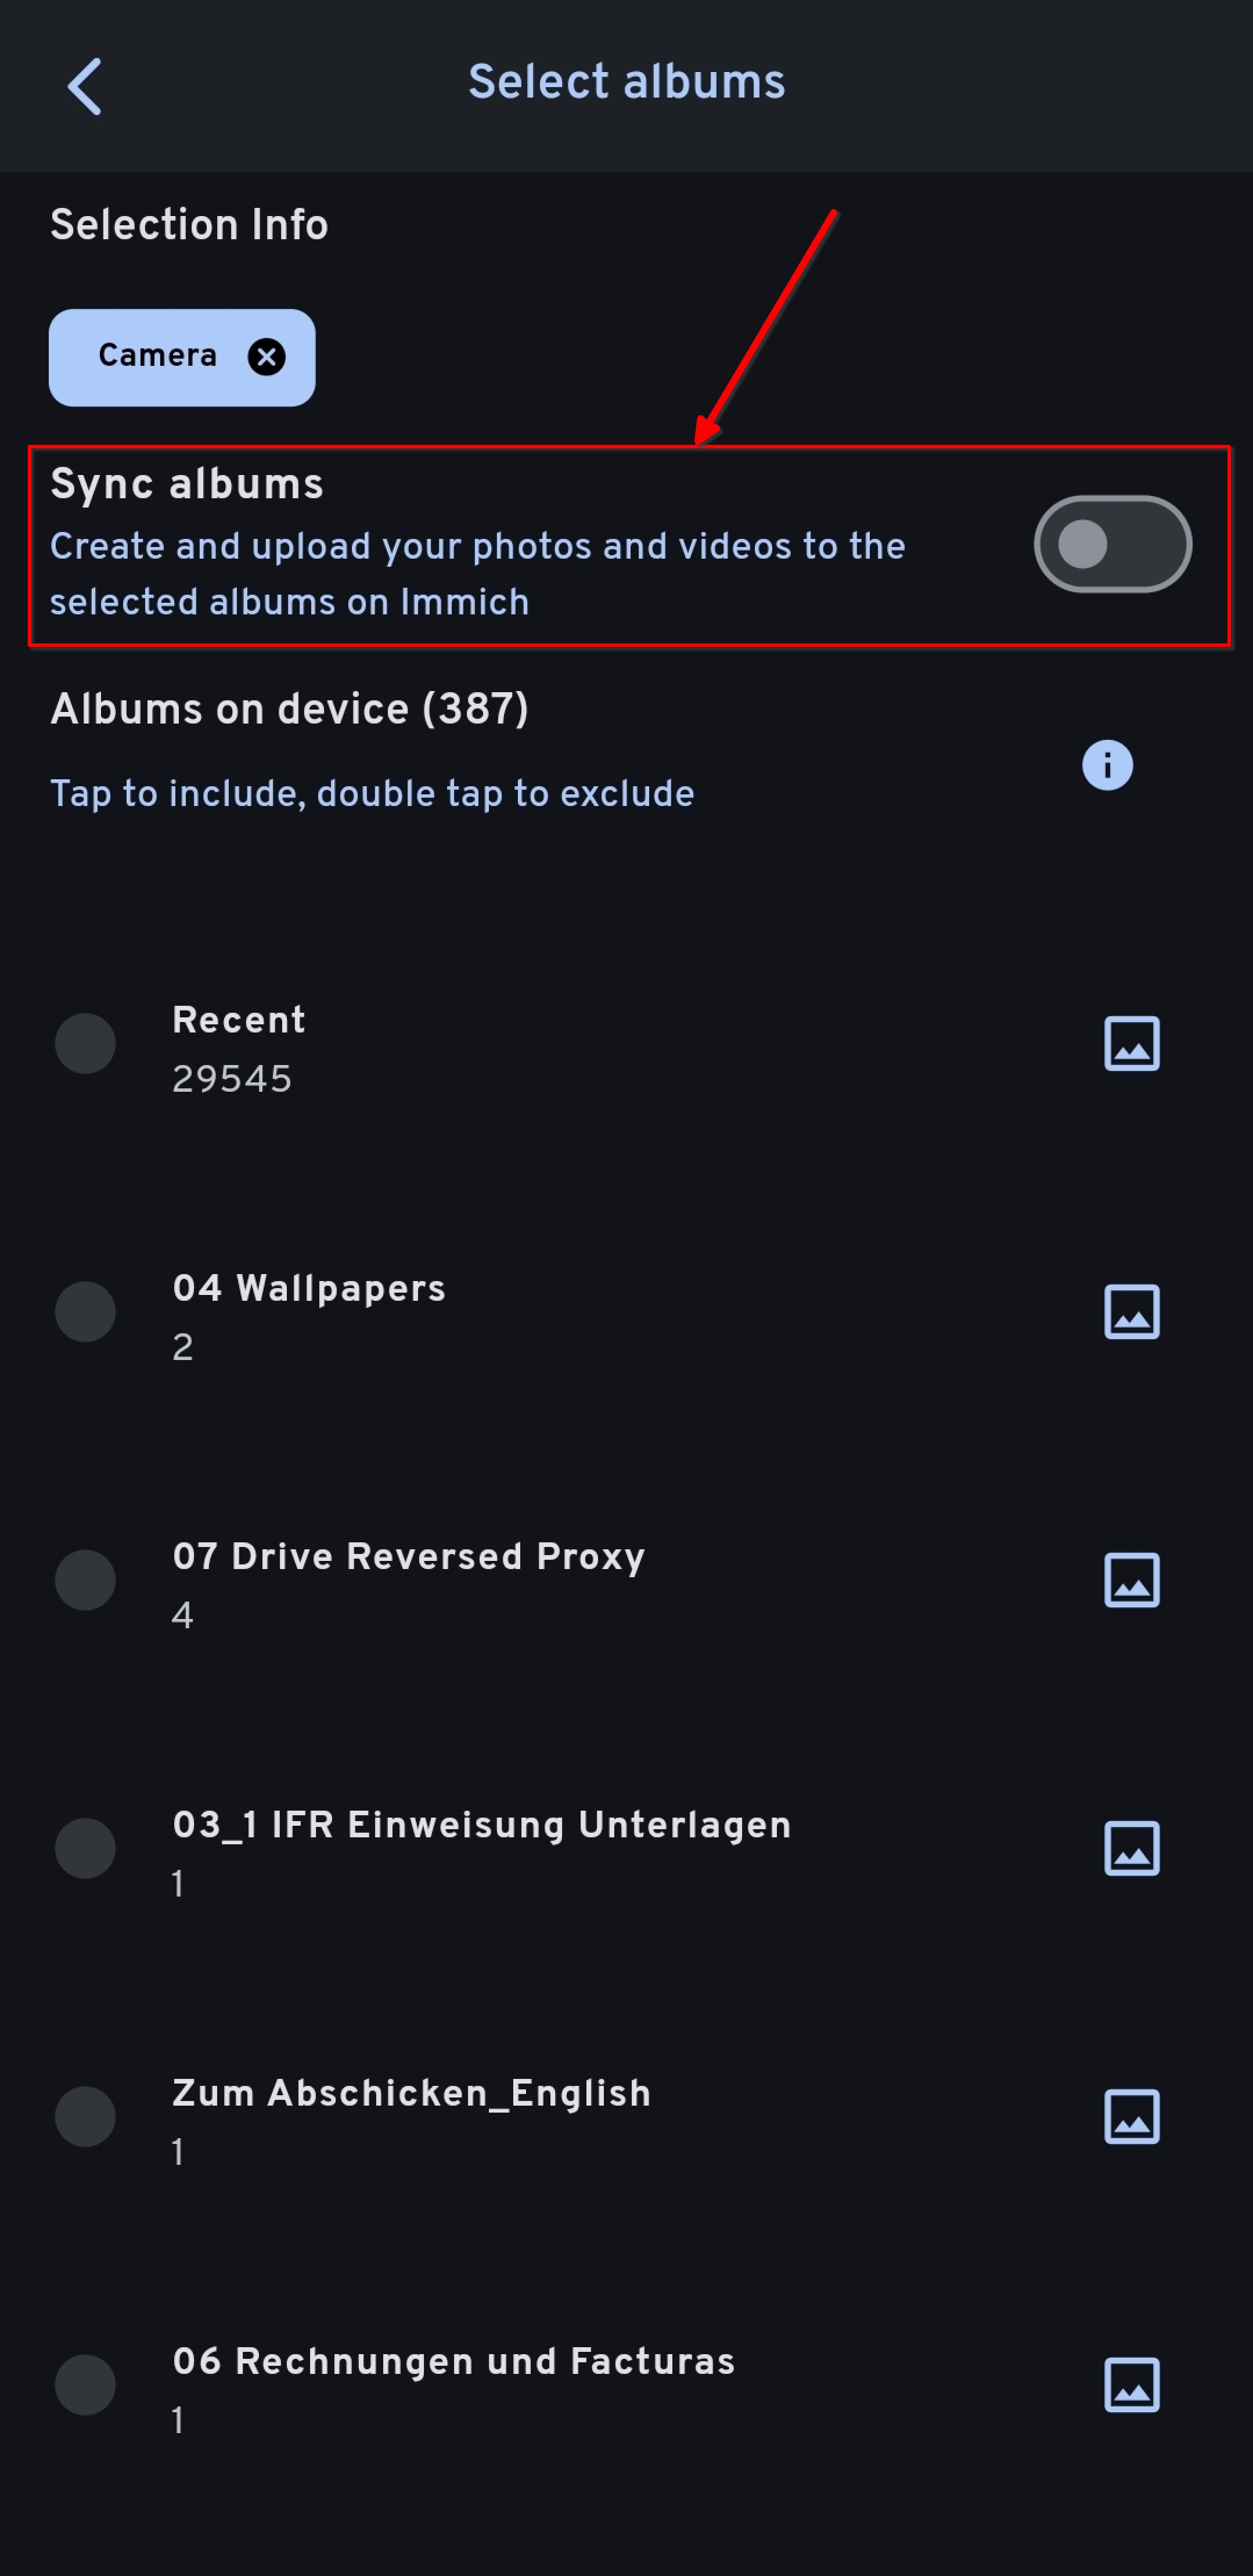
Understanding the "Sync Albums" Option in Immich
From the official Immich Docs:
"You can sync or mirror an album from your phone to the Immich server on your account. For example, if you select Recents, Camera and Videos album for backup, the corresponding album with the same name will be created on the server. Once the assets from those albums are uploaded, they will be put into the target albums automatically."
Key Points:
- One-way Sync: Synchronization is one-way, from the device to the server.
- Album Merging: If an album on the server has the same name as the album on the device, images from the device will be merged with the existing images in the server album.
If you enable the "Sync albums" option, changes made on the server (e.g., deleting a photo) may be reflected not only in the Immich app but also in your device’s default photo app (such as Samsung Gallery or Apple Photos).
⚠️ Important Note:
To avoid unintended changes on your local device, I recommend disabling the "Sync albums" option. This ensures that Immich only performs one-way backups and doesn't affect your local media library.
How to Enable/Disable:
You can toggle the "Sync albums" option in the Backup Settings section of the Immich mobile app.
You can find the settings like so:
Check the following configuration: